
I've been looking forward to sharing this tutorial with you guys ever since I finished it on Thursday afternoon, but Neil and I have been super busy visiting with family all weekend so I kind of disappeared the past few days.. sorry for the lateness! We're back now and settling into vacation-from-a-vacation mode, as per usual. And here it is, better late than never - how to dip dye a dress.
Dip (or ombre) dyeing is relatively easy, so long as you keep a serious eye on your garment, and the entire hands-on process only takes a short amount of time. I was inspired to dip dye because of Josie's gorgeous Lucy dress (from her latest collection), which is pretty much my dream sundress of the moment for the upcoming spring months. With my project, I decided to go with a tiered effect using denim blue dye on a sheer white cotton button up from American Apparel (found here).


What you need for this project.. your garment of choice (cotton works best but depending on what dye you use, it can also work for rayon, silk, wool, etc.. also, make sure the garment is washed before you dye it), 1 cup salt (I used fine crystal sea salt because that's all we had and it worked fine), 1/2 cup liquid or one box powder dye of choice (people complain about RIT dye but it always works for me.. just be sure to buy a specific synthetic dye if you're using synthetic fabric), container to hold dye in (I used a plastic bin), metal spoon, glass measuring cup, hot water, plastic gloves (note - I didn't use them and my blue hands made a mess), and a bit of detergent.
First step - mix together dye, salt, and 4 cups of hot water. This creates your dye solution. Then, add two gallons hot water and a small amount of detergent (detergent encourages the fabric to hold the dye) and stir together. Note - if you use a plastic spoon/container/anything, the dye will stain it.. so don't use a plastic bin or container if you care about how it looks afterward. Glass and metal should be fine.


Next, wet your garment down and squeeze out excess water. Then, it's time to dye. You can dip dye in a couple of ways - by starting at the lowest tier and working your way up by tucking the garment into dye more each time, or the reverse - starting at the top tier of your garment and slowly moving the garment out of the dye in tiers. I went with the last option, and I unfortunately didn't realize how quickly the thin white cotton took the dark blue dye. In the end, I had to create a new top tier by sitting the section in dye for just 10 seconds. Every other tier should receive 3-10 minutes of dye, depending on how dark you want the garment to be and what fabric you're using. I went 3-5 minutes of dye saturation per tier, working my way down each time.


Once this is finished, carefully remove the garment from the dye using rubber gloves and take it to a nearby sink. Here, you'll rinse with cold water, holding the lightest tier upward so the dye runs down to the darkest section, until the water runs clear - then rinse with warm water. Once you're finished, throw your garment in the washer (on its own) using warm water and a small amount of detergent. Dry normally, and you've got a finished product!

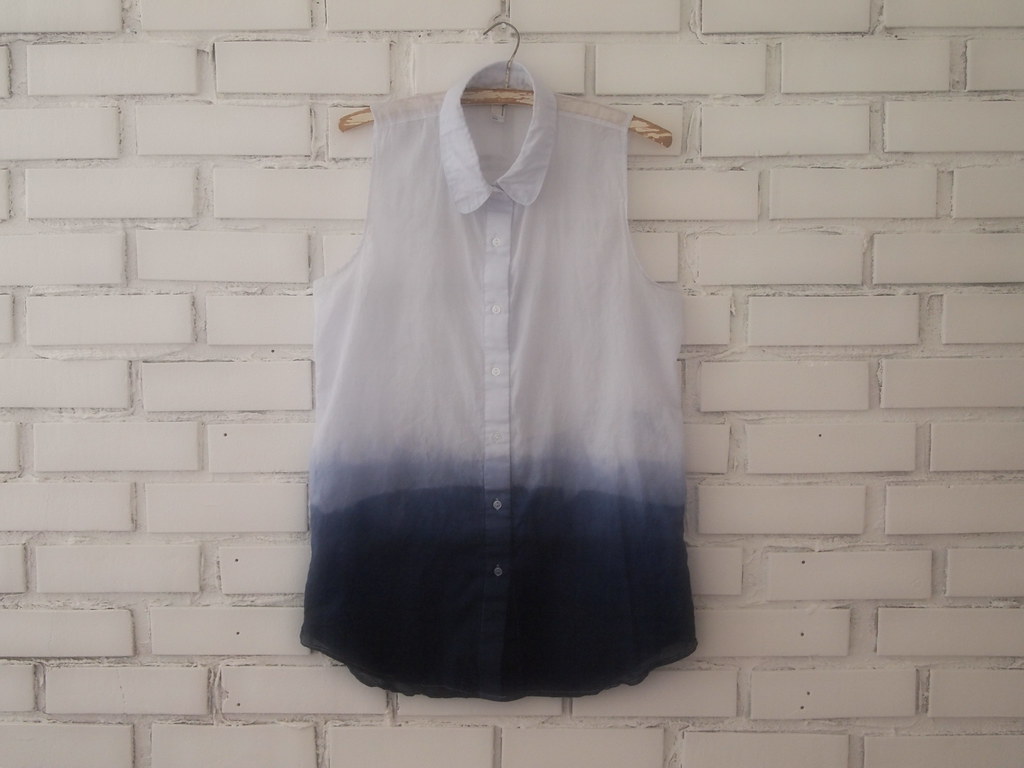
And here it is. My shirt ended up a very pale shade of blue after, probably because I didn't rinse it well enough before throwing it in the wash. It was a happy accident because I love the color, but just a word of warning for those who want to keep the rest of the garment the same hue - rinse super well.

0 comments:
Post a Comment