Sewing Saturday! This week, I decided to sew some tapered leg trousers from a wide-leg pattern using medium weight cotton in a rust hue. Sewing pants has been a bit of a pain for me in the past. Even with vintage patterns, it's hard to find something that suits my short stature, and pants with even an inch or two off from my waist end up overwhelming me because of the ease pattern makers put into their pattern measurements. So this time, I learned my lesson and went small.


I originally planned on altering a children's size pattern but when I realized I'd have to change everything but the waist, I decided to go with a better fit - a vintage 1970s Butterick pants pattern sized for women. The pattern was for wide-legged high waisted trousers, so I looked up this tutorial on altering pants and followed it with a few shortcuts, since I didn't want to change the overall fit of the hips and thigh area - although next time, I plan on following it exactly because I definitely want a slimmer fit on the next pair of pants I sew. Anyone have a quicker way to slim down a pair of trousers?
Personally, one of the hardest parts of sewing for yourself is knowing your measurements really well. I know my shoulder, bust, waist, and hip measurement by heart - but if you want to tailor clothes to fit you exactly, you obviously need to know more. With these pants, I measured the length from my knee to my ankle, from my ankle to my crotch, my knee to my crotch, and my thigh measurement. I guess I've always been used to clothing that fits a bit too big (if I've never said so before, I'm short - 5'2 short), so sewing pieces that fit perfectly hasn't been an issue until now, when I really want to perfect tailored jackets and trousers. I keep gravitating towards menswear but it doesn't seem to work on a petite frame unless it fits just right.
Well, to begin the project - I needed two yards of fabric and a bit of interfacing (the length of the waistband), which I always use muslin or a similar fabric for. A seven inch zipper, snaps for the back, and you're ready to go.


First step.. cut your fabric and mark the front and back waist darts, then sew them in place. The minor alterations I did on this pattern began at the cuff and ended at the knee. I tapered the leg by shortening the pant legs, taking in the pant cuff measurement by a couple inches on both the front and back pieces and cutting diagonal from the new cuff all the way to the knee, gradually tapering to nothing and keeping the knee and above measurements the same. I measured my ankle to knee length by wearing a pair of pants I own and pinning where they hit at the knee, then removing them and checking the measurement. Then sew the pant legs together, front to back at side seams, and press seams open. I cut mine with pinking shears to keep them from fraying.


Put one pant leg into another, right sides together, and sew together on crotch seam - leaving an opening for the seven inch zipper at the back center. Turn the pants wrong-side out and press the zipper seam edges open and pin the zipper in place, then sew - beginning with the right side of the zipper from the bottom to the top on the inside of the garment.

Next, waistband. Sew the interfacing to the wrong side of the waistband within the seam allowance (so it won't show when you sew the waistband to the trousers). Then, fold the waistband in half long-ways, right side together, and sew the edges together at seam allowance. Flip it open and sew right sides together to the trouser waist, making sure to match markings.


Once the waistband is connected to the trousers, flip it to its right side and press the seam allowance on the open end inwards and press to trousers. You will top-stitch along the waistband's bottom edge to secure in place. Next, hem the pant legs to the right length and sew some snaps onto the waistband above the zipper.. you're all set.
 |  |
 |  |
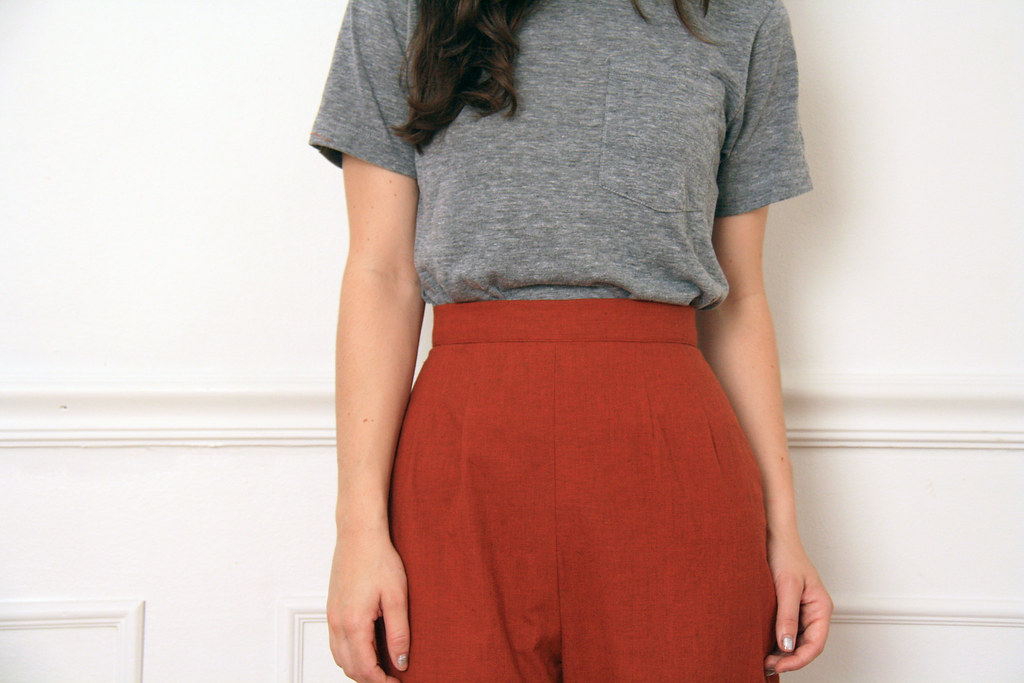
The pattern I used is Butterick 5551 from the 1970s which features an additional coat, peter pan collar dress/blouse, and skirt pattern. The pants are still a little roomy except in the waist, but they are still a vast improvement in sizing from what I've sewn before.. and the good news is they match a blazer I own perfectly, so I might be wearing them together if I'm brave enough this autumn. Next week, I'd like to tackle a blazer or jumpsuit pattern.
I apologize for disappearing last week! A lot of changes are coming up for Neil and I (which I'll get into soon when things are more concrete) and I think I needed the break to work on fall pieces and spend time with friends. I've actually been working hard lately on several projects that I can't wait to share, specifically fall dresses and an upcoming photo shoot with my favorite stylist and photographer team(!!), all coming later this month. So much planned for the greatest season of the year, and fall is only weeks away.. can't wait for pumpkin lattes and and cold weather and Rocky Horror Picture Show.
PS.. today's the last day to enter the silk blouse giveaway! I'm announcing the winner tonight so you have a good half day to enter if you haven't done so already. Hope you had a great weekend!
0 comments:
Post a Comment